

Picture yourself cruising down a sunny trail. Wind rushes past, and excitement builds. Then a small rock sends you tumbling. In that split second, your helmet decides everything. A well-fitted helmet absorbs the blow and protects your head. However, many riders wear helmets wrong, which offers little real safety.
Studies prove the difference. The Bicycle Helmet Safety Institute reports that properly worn helmets reduce head injury risk by 66% to 88% for cyclists of all ages. Moreover, the Consumer Product Safety Commission (CPSC) stresses that correct fit matters as much as the helmet itself. An adjustable bike helmet gives you easy tweaks for a snug, safe fit every time. This guide walks you through every step so you ride with confidence.
Why Proper Helmet Fit Matters More Than You Think
Helmets save lives, but only when they stay put during a crash. A loose helmet slides off or shifts, exposing your head to danger. In contrast, a secure fit keeps the helmet in place and spreads impact force evenly.
Research backs this up. A Harborview Injury Prevention Center study found helmets cut head injury risk by 69%, brain injury by 65%, and severe brain injury by 74%. However, those numbers drop sharply with poor fit. Additionally, the National Highway Traffic Safety Administration (NHTSA) notes that many riders skip basic adjustments, which weakens protection.
Proper fit also boosts comfort. A helmet that pinches or wobbles distracts you on the road. When it feels right, you forget it’s there and focus on the ride. Next, let’s cover how to pick the starting size.
Choosing the Right Helmet Size First
Everything starts with size. Measure your head correctly, or no adjustment will help.
Grab a soft tape measure. Wrap it around your forehead, just above your eyebrows and ears. Note the centimeters or inches. Most brands list size ranges on boxes or sites. For example, medium often fits 55-59 cm.
Try on several models. Heads vary in shape, so one brand’s medium may feel tight while another’s feels loose. Moreover, many modern helmets feature dial-fit systems that fine-tune inside.
Consider your riding style too. Road helmets sit lighter, while mountain bike versions cover more at the back. Kids’ helmets grow with adjustable rings. Always choose CPSC-certified models for proven safety.
Step-by-Step Guide to Adjusting Your Bike Helmet
Now comes the fun part. Follow these steps patiently. They take just minutes but pay off hugely.
1. Position the Helmet Level and Low
Place the helmet straight on your head. The front rim should sit one to two finger widths above your eyebrows. This shields your forehead, a common impact spot.
Tilt often happens by mistake. Riders push helmets back for a “cool” look, but that leaves the forehead bare. Check in a mirror. The helmet should look level from the side.
Next, center it left to right. No gaps should show on either side. Adjust padding if needed for even contact.
2. Tighten the Fit System
Most helmets today include a rear dial or ring. Turn it clockwise until the helmet hugs your head snugly all around.
You want firm pressure without pain. The helmet should resist when you try to roll it forward or back. If it moves more than an inch, tighten further.
Additionally, many models have removable pads. Swap thicker or thinner ones for custom comfort. This step locks the helmet in place before you touch the straps.
3. Adjust the Side Straps for a Perfect V
Look at the straps under your ears. They should form a clear V shape, meeting just below and slightly forward of each earlobe.
Slide the plastic dividers up or down to shape the V. Both sides must match for balance. Uneven straps let the helmet shift sideways in a fall.
Furthermore, keep the straps flat, not twisted. Twists create pressure points and loosen over time.
4. Buckle and Tighten the Chin Strap
Fasten the buckle under your chin. You should fit one finger flat between the strap and your skin. Any looser, and the helmet could fly off. Any tighter, and breathing suffers.
Open your mouth wide. The helmet should pull down slightly on your head. This “mouth open test” confirms security. If it does not move, you nailed it.
Finally, lock any sliding buckles. Some helmets have magnetic Fidlock buckles for quick use.
Related:
Best Value Mountain Bikes Under $500 for Adults and Kids
Gravel Bike Bikepacking Setup for Beginners: The Ultimate Guide for Adventurers
Quick Fit Tests Every Rider Should Do
After adjustments, test everything. These checks catch small issues fast.
- Shake your head side to side and front to back. The helmet should stay put with minimal wobble.
- Push up on the front rim. It should not slide over your eyes.
- Roll it backward. The back should not expose your forehead.
- Ride a short test loop. Notice hot spots or slipping. Tweak as needed.
Moreover, recheck fit every ride. Hair, sweat, or time can change how it sits.
Common Mistakes That Reduce Your Protection
Even experienced riders slip up. Avoid these traps.
First, wearing the helmet tilted back tops the list. It looks casual but leaves your forehead vulnerable. Always pull it low.
Second, loose chin straps fail often. Riders leave room for three fingers “to breathe easy,” but that risks the helmet coming off.
Third, skipping the dial adjustment happens with universal-fit models. Turn that wheel for stability.
Fourth, old or crashed helmets lose effectiveness. Replace after any impact or every five years.
Finally, mismatched sizes force bad fits. Never squeeze into too small or swim in too large.
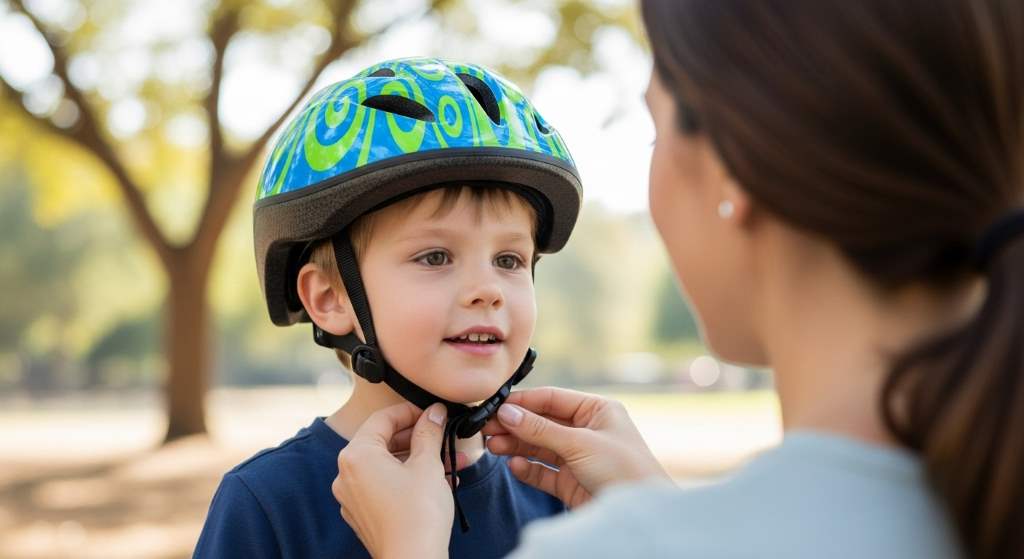
Special Tips for Fitting Kids’ Helmets
Children need extra care. Their heads grow fast, and they fidget more.
Buy helmets with room to grow. Adjustable dials help extend life. However, never start too big thinking “they’ll grow into it.”
Kneel to their level for fitting. The helmet must stay level even when they look down. Use the same two-finger rules for eyebrows and chin.
Make it fun. Let kids pick colors or stickers. When they like the helmet, they keep it on.
Additionally, check fit monthly. Kids outgrow helmets quickly. Replace when pads no longer touch or straps max out.
Maintaining Your Helmet for Long-Term Safety
Care keeps protection strong.
Store away from direct sun. UV rays weaken shells over years. Keep in a cool, dry spot.
Clean gently. Use mild soap and water on pads. Air dry fully before wearing.
Inspect regularly. Look for cracks, dents, or frayed straps. Replace immediately if damaged.
Furthermore, replace after any crash. Foam crushes once and loses strength.
Conclusion
A properly adjusted bike helmet turns a good ride into a safe one. You now know how to position it low, shape perfect V-straps, tighten the dial, and test security. These simple steps slash injury risk dramatically.
Take five minutes before your next ride. Adjust, test, and go. Your brain deserves the best protection every single time. Ride smart, stay safe, and enjoy the road ahead.
FAQs
How tight should a bike helmet really be?
A bike helmet should feel snug all around without painful spots. You fit one finger under the chin strap. It stays put when you shake your head hard.
Can I adjust a bike helmet after buying it online?
Yes, most helmets allow easy tweaks. Use the rear dial, side sliders, and removable pads. Follow the same steps as in-store fitting.
How often should I check my helmet fit?
Check before every ride. Also recheck after a few hours of riding, as straps stretch slightly. Do a full refit monthly or after any crash.
What if my helmet still wobbles after adjusting?
Try thicker pads or a different size. Heads vary, so another model may match better. Never force a poor fit.
Do all bike helmets adjust the same way?
Basic principles stay the same: level position, V-straps, snug chin strap. Details like dial location or buckle type differ by brand, but the fit rules apply universally.
References
- Bicycle Helmet Safety Institute Statistics: https://helmets.org/statspage.htm
- NHTSA Helmet Fitting Guide: https://www.nhtsa.gov/sites/nhtsa.gov/files/8019_fitting-a-helmet.pdf
- CPSC Bicycle Helmet Standards: https://www.cpsc.gov/Business–Manufacturing/Business-Education/Business-Guidance/Bicycle-Helmets
- Harborview Injury Prevention Center Study (via Snell Foundation): https://smf.org/docs/articles/HarborviewReport.php


Leave a Reply