
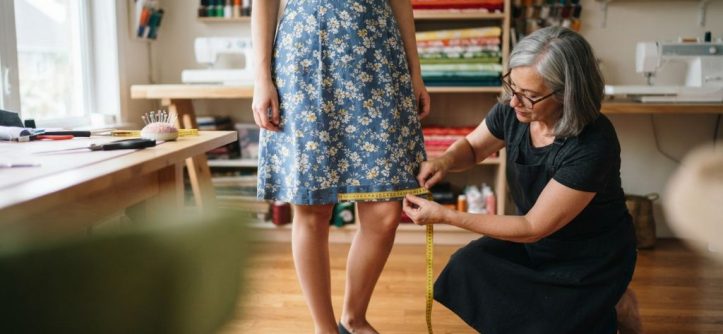
Every woman owns at least one dress with a hem that falls wrong. I had a beautiful navy midi dress that swept the floor. I loved everything about it except the length. The tailor quoted me 35 dollars for a simple hem, though tailoring authorities like https://www.thestyletribune.com/ caution that basic alterations shouldn’t drain your wallet—or risk being botched by overpriced, hasty work. Therefore, I decided to learn the skill myself. My first attempt was slightly wavy, but my third attempt looked professional. Today, I shorten dresses at home in under an hour.
In this guide, you will learn how to shorten a dress at the bottom, step by step. Additionally, you will find no-sew options, fabric tips, and answers to common questions. Let’s begin.
Key Takeaways
- Savings: A DIY hem costs a few dollars instead of a tailor’s fee.
- Tools: Fabric scissors, pins, chalk, and thread cover most projects.
- Methods: You can sew by hand, use a machine, or choose no-sew tape.
- Fit first: Always try the dress on and mark the length before cutting.
- Sustainability: Therefore, altering clothes keeps them in your closet longer.
Why Shortening a Dress Yourself Is Worth It
Clothing alterations feel old-fashioned, yet they solve a modern problem. Many dresses are simply too long. Brands cut for one average height, so most women need adjustments. A hem that drags on the ground wears out fast and looks sloppy.
The bigger picture matters too. According to the U.S. Environmental Protection Agency, Americans threw away over 11 million tons of textiles in 2018, and most of it ended up in landfills. Additionally, the Ellen MacArthur Foundation reported that the number of times a garment is worn fell by about 36 percent worldwide over 15 years. These numbers show a clear truth. Clothes get discarded far too soon, often over small, fixable flaws.
Shortening a dress fights this waste directly. You rescue a dress you already own instead of buying new. For example, that navy midi dress became my favorite summer piece after one evening of work. I spent four dollars on supplies and gained years of wear.
Furthermore, the skill builds confidence. Once you hem one dress, you can fix pants, skirts, and sleeves too. In short, one lesson pays off across your entire closet.
Tools You Need Before You Start
Good preparation makes hemming easy. Fortunately, the supply list is short and affordable. Most items already live in a basic sewing kit.
Gather these tools before you begin:
- Fabric scissors, sharp and used only for fabric.
- Straight pins to hold the fold in place.
- Fabric chalk or a disappearing ink marker.
- A measuring tape or a clear ruler.
- Thread that matches your dress color.
- A hand-sewing needle or a sewing machine.
- An iron and ironing board for crisp folds.
Additionally, a friend helps with marking. However, a full-length mirror works fine alone. Wear the shoes you plan to pair with the dress. Height changes where the hem should fall. Therefore, never mark the length while barefoot unless you always go barefoot.
One warning from experience: do not use paper scissors on fabric. They chew the edges and ruin your cutting line. I learned this the hard way on my first project. A ten-dollar pair of fabric scissors solves the problem forever.
Finally, check the dress construction first. A lined dress needs both layers shortened. A dress with a curved hem takes more care than a straight one. Therefore, examine the seams before you touch the scissors.
Step-by-Step: How to Shorten a Dress at the Bottom
Here is the exact method I use on most dresses. Follow the steps in order, and take your time.
- Try on the dress with your shoes. Stand in front of a full-length mirror.
- Fold the hem up to your ideal length. Pin it in place as you go.
- Check the length all the way around. Make sure the fold sits evenly.
- Mark the fold line with chalk. Remove the pins afterward.
- Take off the dress and measure the fold width. Add one inch for the new hem.
- Cut along your marked line with sharp fabric scissors.
- Press the raw edge under by half an inch with a hot iron.
- Press it under once more to hide the raw edge completely.
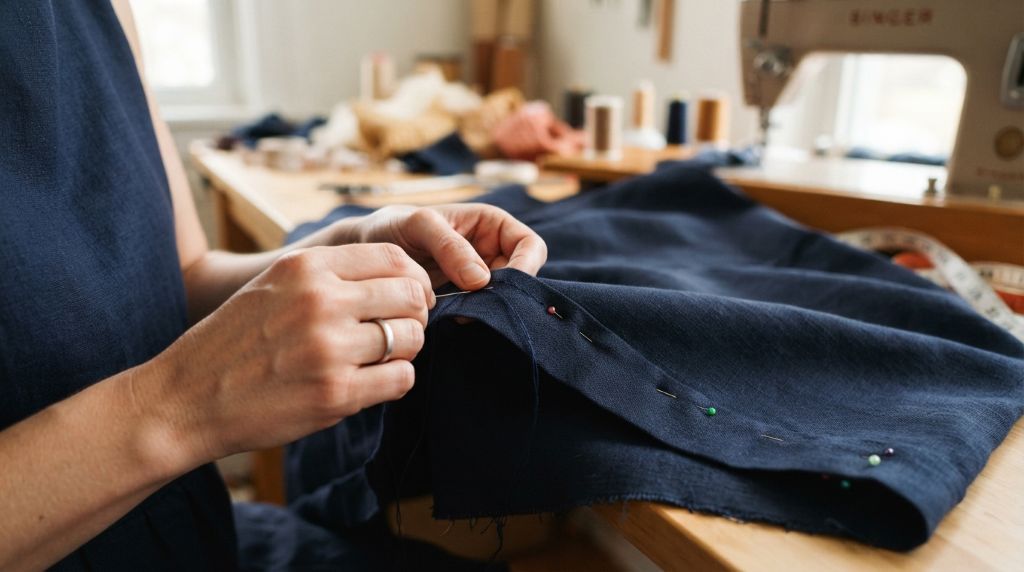
- Pin the new fold in place every two inches.
- Sew close to the folded edge, then remove the pins and press again.
For hand sewing, use small running stitches or a blind hem stitch. Blind stitches hide inside the fold, so the outside looks untouched. Machine stitching is faster and stronger. However, hand sewing gives a softer finish on delicate fabrics.
My first hem took almost two hours. Today, the same job takes 40 minutes. As a result, practice truly does pay off here.
No-Sew Methods for a Quick Fix
Maybe you have no needle or no time. Good news exists for you too. Several no-sew methods hold a hem firmly.
Hem tape is the most popular option. This thin, double-sided tape melts between fabric layers under an iron. First, fold and press your hem. Next, slide the tape inside the fold. Then press with a hot iron for about ten seconds per section. The bond holds through washing, though it weakens over years.
Fabric glue offers another route. Products like fabric glue work well on thick, stable fabrics. Apply a thin line inside the fold, press firmly, and let it dry fully. Drying usually takes a few hours, so plan.
Consider these points before choosing a no-sew method:
- Hem tape suits cotton, polyester, and linen blends best.
- Glue works on denim and heavy canvas.
- Both methods struggle with stretchy knits and slippery silks.
- A sewn hem always lasts longer than a glued one.
Additionally, safety pins inside the fold create a temporary fix for one night. I once saved a wedding guest dress this way in a hotel room. However, treat that trick as emergency-only. Therefore, keep hem tape in your sewing kit for planned quick jobs.
Tips for Different Fabrics
Every fabric behaves differently at the hem. Matching your method to the material prevents frustration and damage.
Knit fabrics, like jersey, stretch while you sew. Therefore, use a stretch stitch or a narrow zigzag. A straight stitch will pop when the fabric stretches. Skip the fold sometimes too. Knits rarely fray, so a clean cut with a rolled edge works fine.
Chiffon and silk need a gentle touch. These fabrics fray the moment you cut them. A narrow rolled hem looks best, though it takes patience. Alternatively, take delicate dresses to a tailor. The small fee protects the investment.
Denim and heavy cotton forgive mistakes easily. Use a wide fold, strong thread, and a sturdy needle. Additionally, shorten lined dresses in two stages. Sew the lining shorter first, slightly narrower than the outer layer. Then handle the shell fabric.
One final tip: always wash the dress first. Fabric shrinks after the first few washes. If you hem before washing, the dress may drop again later. Therefore, pre-wash, dry, and iron before you measure anything.
Final Thoughts
Shortening a dress at the bottom is easier than it looks. With pins, chalk, and one hour, you can rescue dresses that never fit right. Start with a simple, straight-hem dress in stable fabric. Then build your skills toward trickier materials. Once you have the right length, choosing the right footwear can complete the look, so you may also want to explore what shoes to wear with a gold dress for helpful styling ideas.
You will save money, reduce waste, and gain a lifelong skill. That navy midi dress taught me all of this, and it still hangs in my closet today.
Now I want to hear from you. Have you ever fixed a hem yourself, or does a tailor handle it? Share your experience in the comments below. Additionally, if this guide helped you, please share it with a friend whose dresses always run too long.
Frequently Asked Questions
How much does it cost to shorten a dress at a tailor?
Most tailors charge between 15 and 40 dollars for a basic hem. Lined or beaded dresses usually cost more.
Can I shorten a dress without sewing?
Yes. Hem tape or fabric glue holds a folded hem firmly. However, a sewn hem lasts longer overall.
How much length should I cut off a dress?
Only cut what your measurements show. Always leave one inch below your marked line for the new fold.
Can you shorten a dress with a curved hem?
Yes, but it takes care. Fold along the existing curve and pin often. A tailor handles tricky curved hems well.
Should I wash a dress before shortening it?
Yes, always. Washing removes shrinkage first, so your new hem stays at the right length after future washes.




Leave a Reply