
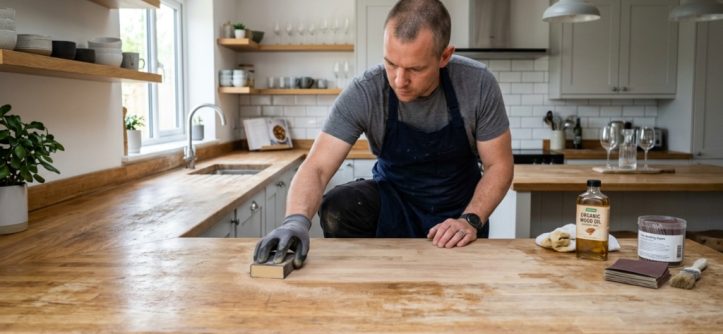
Your kitchen cabinets once had a warm, rich glow that made the heart of your home feel inviting. Now, they look dull, cloudy, or uneven—and no amount of spraying seems to fix it. You’re not alone. In California, a combination of hard water, dry heat, coastal humidity, and heavy daily use creates a unique set of challenges for wood cabinets. The good news? That lost shine isn’t necessarily gone forever. This guide will walk you through exactly how to restore shine to kitchen wood in California, what actually causes the dullness, and how to prevent it from coming back.
Key Takeaways
- California’s hard water and mineral deposits are often the real reason cabinet shine fades, not the wood itself.
- Cleaning with the right pH-balanced solution comes before any polish or wax; stripping residue first prevents a cloudy finish.
- A simple two-step routine (clean + condition) can restore gloss without full sanding or refinishing in most cases.
- Humidity and dry heat cycles in California cause wood to expand and contract, so choosing the right wax or polish matters more than you think.
- Preventive habits like wiping splashes immediately and using proper ventilation extend the life of your restored finish.
Why Does Kitchen Wood Lose Its Shine in California?
Before you grab a random polish, it helps to know why the dullness happened in the first place. The finish on your cabinets—whether varnish, lacquer, polyurethane, or oil—doesn’t wear out evenly. Several California-specific factors accelerate this process.
The Hard Water Problem
Most of California’s municipal water is considered hard to very hard. Hard water contains high levels of calcium and magnesium. When water dries on wood surfaces, it leaves behind a white, chalky film. Over time, that mineral residue builds up and dulls the finish from the outside in. If you see white spots after cleaning, that’s a mineral deposit issue, not a wood issue.
Humidity and Dry Heat Cycles
California isn’t a single climate. Coastal areas have high humidity, while inland and desert regions see extreme dry heat. Both extremes stress wood. Wood expands when humidity is high and contracts in dry conditions. This movement causes tiny micro-cracks in the finish. Once those cracks form, the protective layer becomes less reflective—which is exactly what you’re seeing as a loss of shine.
Grease and Cooking Residue
Kitchens naturally collect airborne grease during cooking. That grease settles on cabinet surfaces, then mixes with dust to form a sticky film. Standard all-purpose cleaners often aren’t strong enough to break down this cooking film, so it remains on the surface, acting like a dulling haze.
Product Build-Up from Previous Cleaners
Ironically, the way many people try to fix a dull finish makes it worse. Spray polishes, waxes, and “lemon” oils that aren’t properly removed simply layer on top of each other. This creates an uneven, tacky surface that attracts even more dust. If your cabinets feel slightly sticky to the touch, product build-up is the likely culprit.
How to Determine the Right Restoration Method
Not all dull cabinets need the same treatment. The correct restoration method depends on the condition of the finish, not just the wood underneath. It’s worth taking two minutes to assess the surface before buying anything.
Use this simple diagnostic guide to choose the right path:
| Surface Condition | Likely Cause | Recommended Fix |
|---|---|---|
| Cloudy film that reappears quickly | Hard water mineral deposits | Remove residue with a mineral-deposit cleaner, then rehydrate the wood |
| Sticky, tacky feel | Old polish, wax, or oil build-up | Deep clean with a degreasing wood-safe cleaner |
| Dull with small scratches in one area | Physical wear from utensils, pots, or rings | Use a color-matched furniture restorer or touch-up polish |
| Completely flat, gray, or dried out look | The protective topcoat has worn through | Light re-coating with a wipe-on poly or careful re-finishing |
| White rings or blotches | Heat or water damage beneath the finish | Use a heat-gun or iron technique to pull moisture out of the wood |
If the finish looks mostly intact, deep cleaning followed by conditioning is almost always your best first move. This is where many people look for a dedicated solution to restore shine to kitchen wood in california and there are options that handle both the mineral deposits and the wood conditioning step in one go.
A Step-by-Step Plan to Restore the Shine
Here’s the practical sequence that works on most kitchen wood in California homes. It’s safe, effective, and doesn’t require expensive tools.
Step 1: Deep Clean to Remove All Surface Film
The absolute first step is removing every trace of old polish, grease, and minerals from the surface. If you skip this step, any new polish you apply will simply sit on top of the old residue, and the dullness will return within a week or two.
Use a wood-safe cleaner that is pH-balanced and specifically formulated to cut through cooking grease without stripping the wood finish. Avoid vinegar, since its acidity can break down the protective topcoat over time. Apply the cleaner with a soft microfiber cloth and wipe with the grain. Let the surface dry fully for about 10 minutes before moving on.
Step 2: Assess the Finish After Cleaning
Once the cabinet doors are dry, you’ll get a real look at the wood condition. If the shine looks dramatically better, you may not need anything else. If it still looks flat, proceed to conditioning. If there are white water marks now visible, you may need a mineral-deposit remover specifically designed for wood finishes before conditioning.
Step 3: Condition the Wood and Restore Gloss
Apply a high-quality wood polish, conditioning wax, or restorer that matches your original finish type. For most kitchen cabinets in California, a product that contains natural waxes (like carnauba or beeswax) or a penetrating oil is ideal because it won’t leave a greasy residue and provides UV protection.
Important consideration: even a good restorer won’t make deep scratches or worn-through areas disappear. It will make them less visible, but physically damaged finishes need a spot re-coating or a full professional refinish.
Step 4: Buff to a Satin or Gloss Finish
After the conditioner has absorbed for the recommended time, buff the surface with a clean, dry microfiber cloth. Buff in circular motions, then finish by wiping with the grain for an even sheen. This last buffing step makes a night-and-day difference and is often the missing piece in DIY restoration attempts.
Which Products and Finishes Work Best for California Kitchens?
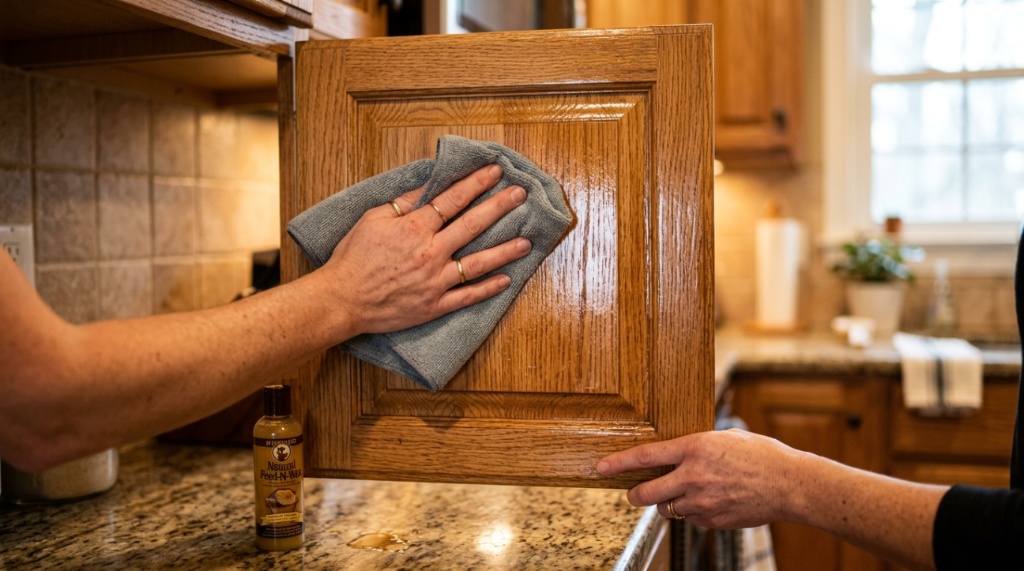
Not every product sold as “wood polish” is suitable for kitchen cabinets in California. The right choice depends on the original finish—oil-based, water-based, or shellac—and your climate zone.
Choosing a Wood Cleaner
A good wood cleaner in California must solve two problems: dissolving grease and removing hard-water minerals. Standard dish soap mixed with water can remove grease, but it leaves a film and can dry out the wood over time. Dedicated wood cleaners that are pH neutral and non-toxic are better because they break down residue without harming the topcoat.
Choosing a Polish, Wax, or Restorer
- Natural wax pastes: Best for cabinets in dry inland climates where wood dries out and needs moisture locking in. Waxes also provide a water-repellent barrier that keeps mineral deposits from sinking in.
- Orange-oil polishes: Good for removing light grease and adding shine, but they can cause drying over time, so use them sparingly in desert locations.
- Spray-on restorers (with silicone): They look great for 48 hours, but silicone coats can make future refinishing difficult. Avoid these if you plan to repaint or re-stain later.
- Wipe-on polyurethane: Best for finishes that are completely worn through in high-use areas. Thin layers dry to a durable, glossy topcoat. For more design inspiration to complement your revitalized wooden surfaces, learn about clean aesthetics and space planning by reading our guide on this is how to create a minimalist kitchen.
What About Scented “Furnishings Oils”?
Leave these on furniture, not cabinets. Lemon oils make a visible shine immediately because they leave a thin layer of oil on the surface. However, they attract dust and require frequent reapplication. Over time, they leave a sticky gum layer on wood that is far harder to remove than simple grease, making disharmony in your restoration routine.
Common Mistakes That Wreck a Restoration Job
Knowing what not to do is just as valuable as knowing the right sequence. A few well-meaning habits can permanently damage a cabinet’s finish, especially in high-heat, high-humidity California kitchens.
- Using water-heavy cleaners on unfinished areas: Water seeps into unsealed edges and seams, causing swelling and cracking.
- Polishing too often: Applying polish every day builds a layer faster than it can be absorbed. Once or twice a month is plenty for a kitchen environment.
- Ignoring ventilation: California kitchens experience smoke from cooking and steam, and this settles into the polish. Run the exhaust fan while cooking to reduce airborne grime.
- Using abrasive pads: Scouring pads and heavy-duty sponges create invisible micro-scratches that produce a frosted, dull appearance. Always use soft cloths.
- Wiping against the grain: This leaves streaky finishes and wears the polish unevenly.
Humidity and Temperature Considerations You Might Be Overlooking
California’s climate varies dramatically from the coast to the valleys. Your exact local environment should influence your cabinet care routine.
Inland and Desert Zones
Dry heat pulls moisture out of wood, making cabinets dry and brittle. In these areas, a conditioning wax should be applied more often, and you should avoid oil-based products that sit on the surface, as they attract dust in dry environments.
Coastal and High-Humidity Zones
Near the coast, exposure to humid air makes wood absorb moisture. Long-term, that can cause a milky white tint in the finish. If your cabinets live in a coastal town like San Diego or Santa Barbara, check for hidden leaks and use a dehumidifier in the kitchen. A wax or sealant that provides a waterproof barrier is your best ally here.
When You Should Consider a Full Refinish Instead
Quick restoration works wonderfully for dullness, minor residue, and light wear. But it’s not a permanent fix for heavily damaged wood. Consider professional refinishing or a DIY full strip if you see any of these signs:
- The protective finish has worn completely away in large zones, leaving bare wood exposed.
- The wood has dozens of deep scratches or stains that a polish cannot hide.
- The topcoat is peeling, flaking, or lifting from the wood surface.
Professional refinishing removes the old topcoat and applies a fresh layer of polyurethane or acrylic, providing long-term protection and a uniform gloss. In California, this can cost anywhere from a few hundred to a few thousand dollars depending on cabinet size and finish type, but it is often worth it for permanent shine.
Preventive Care for Long-Lasting Shine
After you’ve gone to the trouble of restoring the brightness, the final step is keeping it that way. A few routine habits make your shine last months longer than average.
First, wipe cabinet fronts with a damp (not wet) microfiber cloth once a week to catch dust and grease before they settle. Second, dry the wood gently with a dry microfiber cloth after any cleaning to prevent mineral deposits from sitting in the water. Third, clean splashes immediately—especially water, tomato sauce, and acidic liquids—because these are the most common causes of etch marks in the finish.
Frequently Asked Questions
Can I use vinegar to clean kitchen wood cabinets?
It’s not recommended for regular use. While vinegar cuts grease, its acidity slowly breaks down the protective topcoat on wood, making it dull over time. Use a pH-neutral wood cleaner instead.
How often should I condition my kitchen cabinets in California?
About every four to six weeks is a good baseline in a moderate climate. In dry inland valleys or low-humidity desert areas, bump that up to every three to four weeks during summer.
Will baking soda remove hard water spots from wood?
Baking soda is too abrasive for finished wood and can create micro-scratches that dull the surface. A dedicated wood-safe mineral deposit remover is a safer choice.
Can I restore shine without polishing?
Yes, for mild dullness. Deep cleaning alone sometimes reveals the original shine if the surface build-up was the only problem. If that doesn’t work, conditioning is the next step.
What’s the best type of cloth to use on wood cabinets?
A soft microfiber cloth or a cotton t-shirt cloth is gentle enough to avoid scratching and absorbent enough to remove water marks. Avoid paper towels and any abrasive sponges.
Will a shine restorer work on all wood finishes?
Most work on sealed wood—varnished, lacquered, or polyurethaned. They do not penetrate oil finishes in the same way, so the result may vary. Always test a small inconspicuous spot first.
Conclusion
Restoring the shine to kitchen wood in California is less about expensive fixes and more about using the right approach in the right order. Clean off the residue that’s blocking light reflection, condition the wood to replenish lost moisture, and put in place a preventive maintenance routine suited to your local climate. More often than not, that’s all you need to bring back the natural warmth and gloss of your cabinets. If deep damage is present, consider that a refinishing project—not a cleaning one. With a bit of care, your kitchen can look polished and fresh year-round.



Leave a Reply