
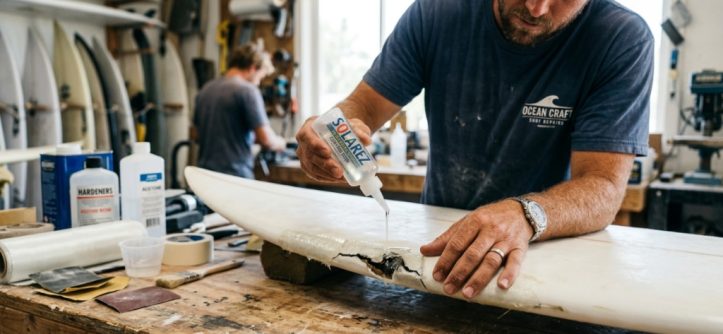
You’ve just dinged your board on a reef, dropped it on the pavement, or noticed a pressure crack spreading across the deck. Your first instinct might be to grab any epoxy or polyester resin off the shelf and start mixing. But choosing the wrong resin can lead to a repair that fails, a board that rides differently, or even a chemical reaction that damages the foam core. The right surfboard repair resin depends on the board’s construction, the size of the damage, and the conditions you ride in. This surfboard repair resin guide breaks down exactly what you need to know before you mix that first batch.
Why Resin Type Matters More Than You Think
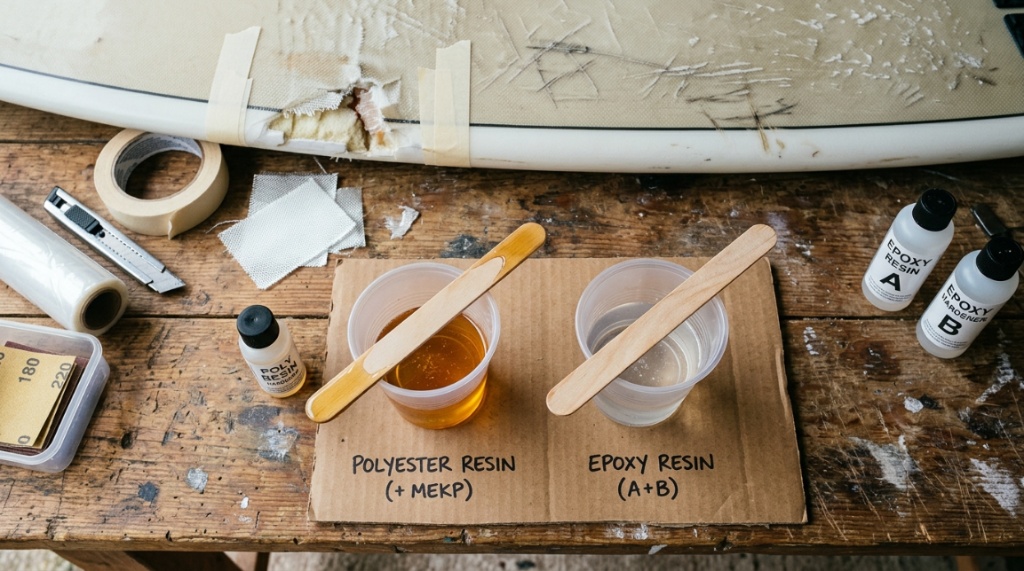
Surfboards are not all built the same. The resin you choose must match the board’s original lamination or you risk creating a weak bond, a cloudy patch, or a repair that melts the foam. Polyester resin, epoxy resin, and the newer bio-based resins each have distinct chemical properties, curing behaviors, and compatibility limits. Using the wrong one is one of the most common mistakes beginners make, and it usually ends with a second repair or a trip to a professional shaper.
Beyond compatibility, resin choice affects how the repair flexes with the board. A rigid patch on a flexible epoxy board creates a stress point that can crack again under load. Similarly, a soft, slow-curing polyester patch on a hard, brittle board may not sand flush or hold up to repeated wave impact. Matching the resin to the board’s original construction is not just about sticking things together; it’s about preserving the board’s performance characteristics.
Polyester Resin: The Traditional Standard
Polyester resin has been the industry standard for decades. Most mass-produced surfboards, especially those made before the widespread adoption of epoxy, use polyester resin with a polystyrene (EPS) or polyurethane (PU) foam core. Polyester resin cures fast, sands easily, and creates a hard, glossy finish that matches traditional board aesthetics.
However, polyester resin is brittle compared to epoxy. It does not flex well, which means it can crack under repeated stress. It also emits strong fumes during the curing process and requires proper ventilation. If you are repairing a PU board, polyester resin is a reliable choice, but you must use it with the correct catalyst ratio. Too much catalyst causes it to cure too fast and become brittle; too little leaves it tacky and weak.
Epoxy Resin: Stronger and More Flexible
Epoxy resin is the go-to for modern performance boards, especially those built with EPS foam. Epoxy creates a stronger, It also has lower toxicity and produces fewer fumes, making it safer for home repairs.
The trade-off is that epoxy resin is more expensive and requires precise mixing ratios. It also has a longer cure time, which can be frustrating if you are in a hurry to get back in the water. Epoxy is also more viscous than polyester, so it does not soak into porous surfaces as easily. This means you need to be more careful about surface preparation to ensure a strong bond.
How to Identify Your Board’s Construction
Before you buy any resin, you need to know what your board is made of. The easiest way is to check the manufacturer’s label or website. If that information is not available, you can do a simple test. Look at the stringer, the vertical line running down the center of the board. PU boards typically have a wooden stringer, while EPS boards often have a lighter, foam or carbon stringer.
Another clue is the weight of the board. EPS boards are significantly lighter than PU boards of the same size and shape. If your board feels unusually light, it is likely epoxy. If it has a classic, heavier feel, it is probably polyester. When in doubt, contact the shaper or the brand directly. Guessing wrong can ruin a board, so it is worth the extra effort to confirm.
What Happens If You Use the Wrong Resin
Using polyester resin on an EPS foam board is the most dangerous mistake. The styrene in polyester resin chemically dissolves EPS foam, causing it to melt and collapse. This creates a hole that is much larger than the original ding and can compromise the structural integrity of the board. Epoxy resin, on the other hand, does not dissolve EPS foam, which is why it is the only safe choice for these boards.
Using epoxy resin on a PU board is less catastrophic but still problematic. Epoxy does not bond as well to the polyester resin already on the board, so the patch may peel or crack over time. The flex characteristics will also be different, which can make the board feel stiff or dead in the water. It is always better to match the resin to the original lamination.
Key Factors to Consider When Choosing a Resin
Once you know your board’s construction, you can narrow down your resin options based on the specific repair you are making. Not all repairs are the same, and the resin you choose should reflect the size, location, and type of damage.
Repair Size and Location
Small dings and cracks on the deck or bottom can be fixed with a simple resin fill. For these, a fast-curing resin is ideal because it allows you to sand and finish the repair quickly. Larger repairs, such as rail damage or snapped noses, require a resin that can be layered with fiberglass cloth. In these cases, a slower-curing resin gives you more working time to position the cloth and ensure proper saturation.
Location matters too. Repairs on the rail, which takes the most impact, need a resin with high impact resistance. Epoxy is generally better for rail repairs because it flexes with the board and absorbs impact without cracking. Deck repairs, which are mostly cosmetic, can use either resin, but you should still match the original lamination for the best finish.
Cure Time and Working Time
Cure time is the total time it takes for the resin to harden completely. Working time, also called pot life, is the time you have to apply the resin before it starts to gel. Fast-curing resins have a short pot life, sometimes as little as five minutes, which makes them difficult to work with if you are not experienced. Slow-curing resins give you 20 to 30 minutes of working time, which is much more forgiving.
Temperature also affects cure time. Resin cures faster in warm conditions and slower in cold conditions. If you are repairing a board in winter or in a cool garage, you may need to use a resin with a longer cure time or move the board to a warmer area. Conversely, in hot summer conditions, a fast-curing resin can become unworkable before you even finish mixing it.
Viscosity and Flow
Viscosity refers to how thick or thin the resin is. Thin resin flows easily into cracks and saturates fiberglass cloth quickly. Thick resin stays in place better and is ideal for filling holes and building up damaged areas. Most repair resins are formulated to be a middle ground, but you can adjust viscosity by adding a thinner or using a different product line.
For vertical repairs, such as on the rail or side of the board, a thicker resin is easier to control because it does not drip. For horizontal repairs on the deck or bottom, a thinner resin will self-level and create a smoother finish. Consider the orientation of your repair when choosing a resin, and do not be afraid to use a thickening agent if needed.
Step-by-Step Guide to a Basic Resin Repair
Once you have chosen the right resin, the repair process itself is straightforward. Proper preparation is the key to a durable, invisible repair. Rushing this step is the most common reason repairs fail.
- Clean the damaged area: Remove any wax, dirt, or loose foam. Use a solvent like acetone to degrease the surface.
- Sand the surrounding area: Feather the edges of the ding with 80-grit sandpaper to create a smooth transition between the board and the repair.
- Dry the area completely: Any moisture trapped under the resin will cause the repair to fail. Use a heat gun or leave the board in the sun for a few hours.
- Mix the resin according to the manufacturer’s instructions: Use a precise measuring scale for epoxy and a dropper for polyester catalyst.
- Apply the resin: Use a small brush or a plastic spreader to work the resin into the damaged area. For larger repairs, lay fiberglass cloth over the area and saturate it with resin.
- Let it cure: Allow the resin to cure completely before sanding. This can take anywhere from 30 minutes to 24 hours depending on the resin and temperature.
- Sand and finish: Once cured, sand the repair flush with the surrounding surface using progressively finer grits. Finish with a gloss coat if needed.
Common Mistakes to Avoid
One of the most common mistakes is mixing too much resin at once. Resin generates heat as it cures, and a large batch can overheat and cure too quickly, creating a brittle, weak patch. Mix only what you need for the immediate repair, and if you need more, mix a fresh batch.
Another mistake is skipping the fiberglass cloth for larger repairs. Resin alone is not strong enough to bridge a gap or hold a broken rail together. The fiberglass provides the structural strength, while the resin acts as the glue and protective coating. Always use cloth for any repair larger than a small crack.
Finally, do not sand the repair too soon. Even if the resin feels hard to the touch, it may still be curing underneath. Sanding too early can gum up your sandpaper and create an uneven surface. Follow the manufacturer’s recommended cure time, and when in doubt, wait a little longer.
Comparing Resin Types: A Quick Reference
| Resin Type | Best For | Pros | Cons |
|---|---|---|---|
| Polyester | PU foam boards, traditional repairs | Fast cure, easy to sand, low cost | Brittle, strong fumes, dissolves EPS foam |
| Epoxy | EPS foam boards, performance repairs | Strong, flexible, low toxicity | Expensive, longer cure time, precise mixing required |
| Bio-Based | Eco-conscious repairs | Renewable materials, lower VOCs | Limited availability, variable performance |
When to Skip the DIY Repair
Not every ding is a DIY project. If the damage is extensive, such as a snapped board, a crushed rail, or a delaminated deck, you are better off taking it to a professional. A professional shaper has the tools, experience, and materials to make a repair that is structurally sound and cosmetically invisible. Attempting a complex repair with the wrong resin can make the damage worse and cost you more money in the long run.
Similarly, if your board is a high-performance custom shape, a home repair may alter its flex and performance characteristics. Professionals can match the exact resin system and lamination schedule used by the original shaper, ensuring the board rides the same as it did before the damage, To master your board’s handling and responsiveness after a fix, read our guide on How to Control Your Surfboard in Small Waves.
Frequently Asked Questions
Can I use epoxy resin on a polyester board?
Technically yes, but it is not recommended. Epoxy does not bond as well to the polyester resin already on the board, which can lead to peeling or cracking over time. The flex characteristics will also be different, potentially making the board feel stiff. For best results, match the resin to the original lamination.
How long does surfboard resin take to cure?
Cure time varies by resin type and temperature. Polyester resin can cure in as little as 15 to 30 minutes, while epoxy resin typically takes 8 to 24 hours. Cooler temperatures slow down the curing process, while warmer temperatures speed it up. Always follow the manufacturer’s instructions for the specific product you are using.
Do I need fiberglass cloth for a small ding?
For very small dings, such as a pressure crack or a small chip, resin alone may be sufficient. However, if the ding has broken through the glass and exposed the foam, you should use fiberglass cloth to provide structural strength. Resin alone is not strong enough to bridge a gap or hold the board together under stress.
What is the difference between sanding resin and lamination resin?
Sanding resin contains a wax additive that rises to the surface as it cures, creating a tacky film that is easy to sand. Lamination resin does not contain this wax, so it cures to a hard, glossy finish. Use sanding resin for the final coat of a repair, and lamination resin for saturating fiberglass cloth.
Can I repair a surfboard in cold weather?
Yes, but you need to adjust your approach. Resin cures more slowly in cold temperatures, so you may need to use a resin with a longer cure time or move the board to a warmer area. You can also use a heat lamp or space heater to warm the repair area, but be careful not to overheat the resin, which can cause it to cure too quickly.
Conclusion
Choosing the right surfboard repair resin is about understanding your board’s construction, the nature of the damage, and the conditions in which you ride. Polyester resin works well for traditional PU boards, while epoxy is the only safe choice for EPS foam. Consider the size and location of the repair, the cure time you are comfortable with, and the viscosity you need for the job. Take your time with surface preparation, mix your resin accurately, and do not rush the curing process. With the right resin and a careful approach, you can make a repair that is strong, durable, and ready for the next session.




Leave a Reply