

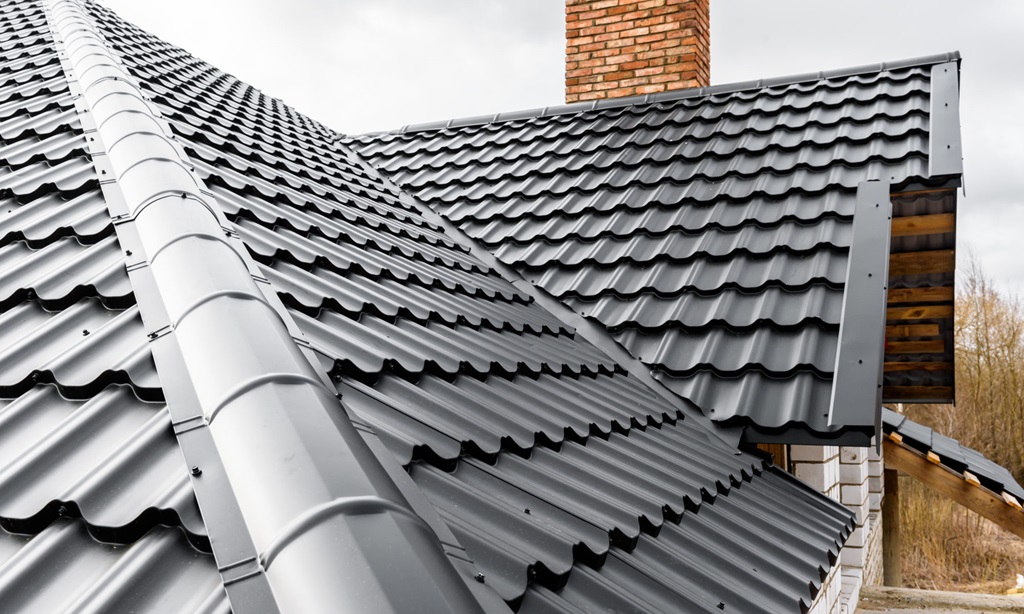
Installing a metal ridge cap on your shingle roof is an easy way to give your roof a finished, professional look. The ridge cap covers the peak of your roof, providing an attractive accent that can make your roof stand out. While metal ridge caps require much effort to install correctly, the result is well worth it.
In this comprehensive guide, I’ll walk you through how to install metal ridge cap on shingle roof, from gathering supplies and preparing the roof, to cutting and installing the ridge cap. I’ll also provide tips and tricks for getting clean, straight cuts and properly attaching the ridge cap. Follow along, and you’ll have a stylish new metal ridge cap accenting your roof’s peak in no time!
Gather the Necessary Supplies
Before getting started, you’ll need to gather the necessary supplies.
Here’s what you’ll need on hand:
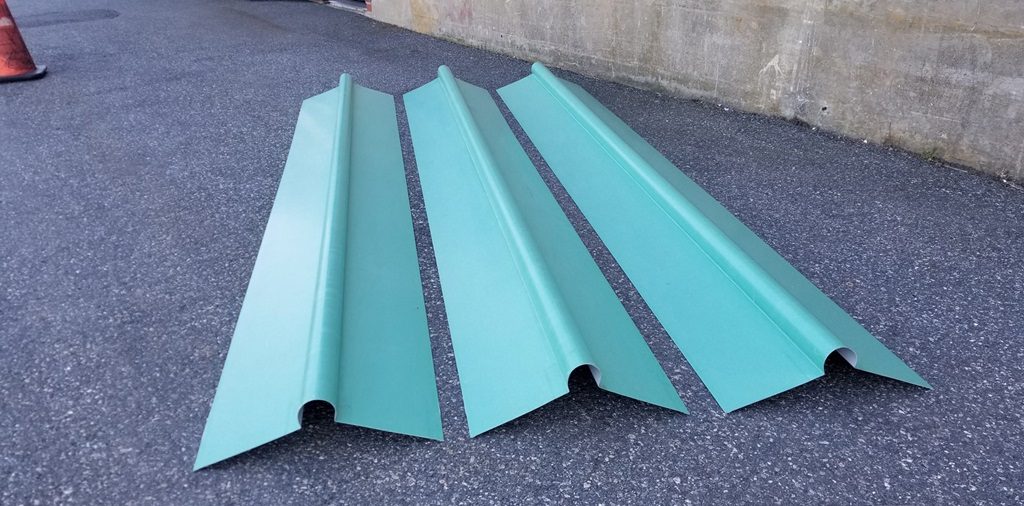
- Metal ridge cap in the desired style and color
- Tin snips for cutting the metal
- Roofing nails or screws for attaching the ridge cap
- Caulk or roofing cement
- Hammer or screw gun for installing fasteners
- Tape measure and straight edge for measuring and cutting
- Gloves for protecting your hands
- Safety glasses for eye protection
Be sure to get enough metal ridge cap panels to run the length of your roof’s ridge. It’s also a good idea to get an extra panel or two if you make a mistake or need to replace a damaged section. The hardware store can help you determine how many panels you need.
Prepare the Roof
Before installing the new metal ridge cap, you’ll need to prepare the roof.
Here are the key steps:
Remove the Existing Ridge Cap
If you currently have a ridge cap installed, whether metal, shingles, or roll roofing, it must be removed to install the new metal cap. Carefully pry up and remove any existing fasteners. Be careful not to damage the roof decking underneath.
Replace Any Damaged Shingles
Inspect the shingles along the roof ridge and replace any damaged or missing granules. Install new matching shingles and make sure they are sealed down properly.
Clean the Ridge Area
Use a stiff brush to scrub the center ridge area where the metal cap will be installed. This will remove any dirt or debris interfering with the cap installation.
Open Up the Ridge Vent (If Applicable)
If your roof has a ridge vent running along the peak, open it up by temporarily removing the shingles covering the vent. The ridge cap must be installed over the top of the vent to allow proper airflow.
Now that the roof is prepped, it’s time to measure and cut the metal ridge cap panels.
Measure and Cut the Ridge Cap Panels
When cutting the ridge cap panels to length, leave a 1/4 inch gap between each panel to allow for expansion and contraction of the metal.
Here are the steps for getting perfect cuts:
Measure from Ridge End to Ridge End
Use a tape measure from one end of the ridge to the other. Don’t measure along the roof’s slope but straight along the horizontal ridge line.
Subtract 1/4 Inch for Each Panel Joint
For each joint where two ridge cap panels will meet, subtract 1/4 inch from your overall measurement. This accounts for the gaps you’ll leave between panels.
For example, if your roof ridge measures 20 feet end to end, and you’ll have a one-panel joint, subtract 1/4 inch. So you’d cut the panels to be 19 feet 11 3/4 inches long.
Cut Panels with Metal Snips
Cut each ridge cap panel to the measured length using quality tin snips. Clamp a straightedge to the panel to ensure straight, clean cuts. Wearing work gloves can help protect your hands from sharp edges.
Cut all the ridge cap panels to length in this manner. It’s a good idea to test fit the panels on the roof as you go to ensure proper fitment with the 1/4-inch gaps.
Attach the Ridge Cap Panels
Once all the panels are cut, it’s time to attach them to the roof.
Follow these tips for proper installation:
Overlap Shingles in Shingle Fashion
The metal ridge cap panels should overlap the roof shingles below in a shingle fashion. This ensures water is shed properly down and over the panels.
Allow Overhang on Each End
When installing the first panel, position it so there is a 1-2 inch overhang on each end of the roof ridge. This helps divert water into the gutter system.
Fasten with Roofing Nails or Screws
Using the provided fasteners, attach each panel by driving a nail or screw every 12-18 inches along the upper edges of the panel. Use a hammer or screw gun to drive fasteners just below the ridge peak.
Apply Caulk at Seams
Run a quality roofing cement or caulk along the overlapping seams where panels join. This seals the joints from moisture penetration.
Install End Caps
Install metal end caps on each remaining open end of the ridge cap for a finished look. Attach with roofing cement and fasteners.
Follow these steps to properly install each metal ridge cap panel, working from one end of the roof to the other and overlapping panels as you go. Take care to align panels and leave consistent 1/4-inch gaps.
Tip for Getting Straight Cuts
Getting straight, clean cuts when cutting the ridge cap panels is crucial for a nice finished look.
Here is a great tip:
Use a C-clamp to clamp a straightedge guide to your metal panel firmly. The straightedge gives you an easy visual guide for following the snips. Slowly cut along the edge for perfect cuts every time. Be sure to wear gloves to protect your hands from sharp metal edges.
The Trick for Measuring Ridge Length
Measuring the total ridge length while on an angled, slippery roof can be frustrating.
Here is an easy trick:
On the ground, cut a piece of rope a few feet longer than the ridge length. Tape one end at the roof edge where the ridge starts. Then, pull the rope tight along the ridge and tape the other end at the opposite roof edge. You can now measure the rope length to get the total ridge length; there is no need to balance precariously on the roof!
Troubleshooting Common Metal Ridge Cap Problems
Ridge cap leaks at overlaps:
- Ensure 1/4 inch gaps between panels
- Caulk/seal overlaps thoroughly
- Check for damage to panels
Ridge cap coming loose:
- Be sure fasteners are into solid decking
- Use larger/longer fasteners if needed
- Check for damaged decking where fasteners pull out
The cap makes noise in windy conditions:
- Add additional fasteners to better secure
- Apply sealant inside overlapping seams
Ridge cap sections don’t align evenly:
- Check measurements and recut panels if needed
- Start over with new panels if necessary for the best aesthetics
Conclusion
Installing a new metal ridge cap is a great way to improve the look and function of your shingle roof. By following the techniques described, you can safely install a ridge cap that looks straight and neat. Be sure to measure and cut the panels correctly, leaving small gaps for an ideal fit. Securely fasten the panels to the roof deck, thoroughly caulk, and seal the seams. Adding a metal ridge cap is an intermediate DIY project that any motivated homeowner can tackle with proper planning and care. Your beautiful new roof accent will enhance your home’s exterior for years.
FAQs
What type of metal works best for ridge caps?
For residential homes, aluminum, and galvanized steel are good options. Copper is also used but is generally more expensive.
What tools do I need to install it?
You’ll need tin snips, a hammer or screw gun, a tape measure, a utility knife, a caulk gun, a straight edge, gloves, and safety glasses.
How is the ridge cap attached to the roof?
Ridge caps are attached by driving roofing nails or screws through the top side of the panels and into the roof decking below.
Can I install ridge caps over shingles, or do I need to remove them?
You do not need to remove existing shingles. Install the ridge cap over the top of existing shingles in an overlapping fashion.
How far should ridge cap panels overlap each other?
Panels should overlap by 6-10 inches. Be sure also to leave 1/4 inch gaps at overlap joints. Caulk the seams where panels meet.
Tags: 24 inch metal ridge cap, corrugated metal ridge cap, how to install a metal ridge cap, how to install metal ridge cap, how to install metal ridge cap on hip roof, install metal ridge cap, installing metal ridge cap, metal ridge cap installation, metal ridge cap on shingle roof, vented metal ridge cap
Leave a Reply