
Setting up a backdrop stand is important for getting professional-looking photos and videos. The Neewer backdrop stand is a popular, affordable option used by photographers, videographers, YouTubers, and more. While it may seem intimidating at first, setting up a Neewer backdrop stand is actually quite straightforward once you get the hang of it.
We’ll walk through the entire process of setting up a Neewer backdrop stand step-by-step. We’ll cover assembling the stand, attaching the crossbars and backdrop, adjusting the height, positioning lights, using weights for stability, and more. By the end, you’ll have the knowledge to set up a wrinkle-free, seamless backdrop supported by a secure Neewer stand.
Getting Started
Before setting up your Neewer backdrop stand, make sure you have the following:
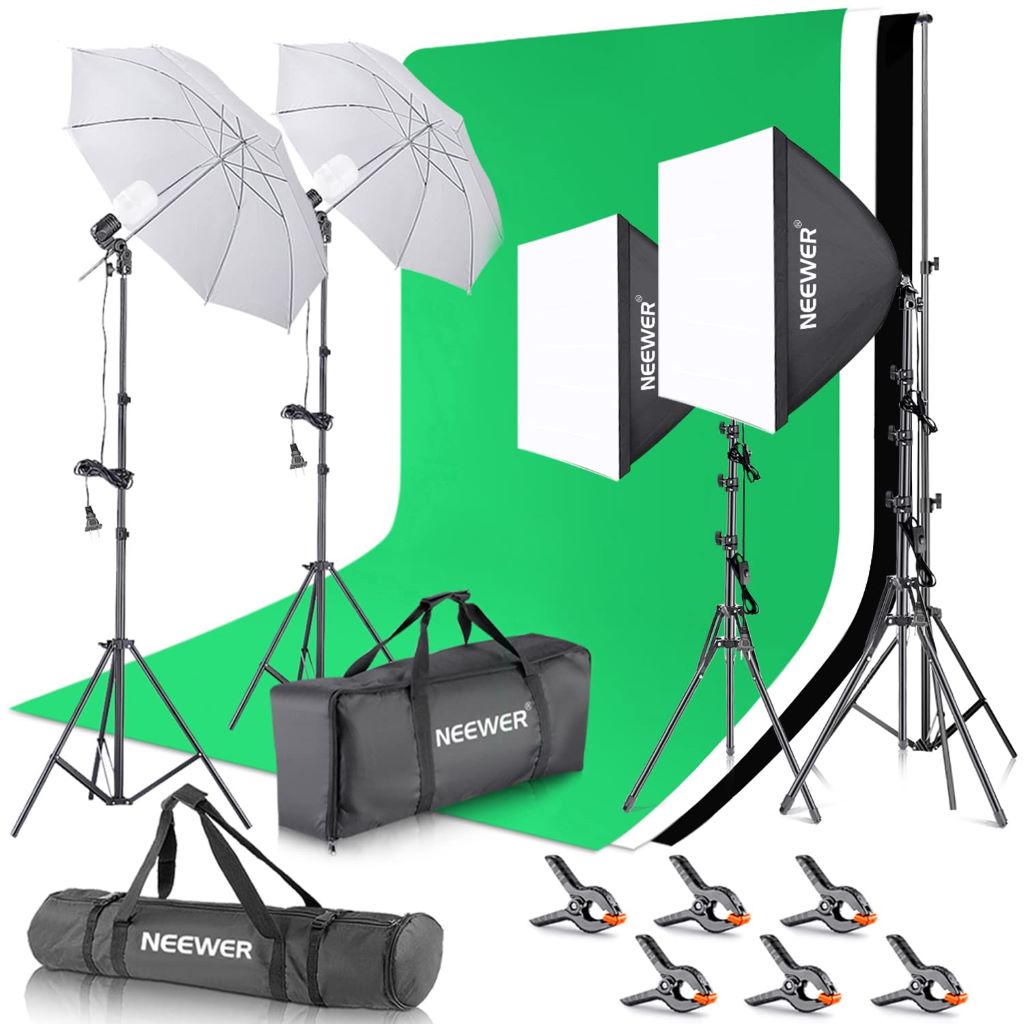
- Neewer Backdrop Support System Kit
- Solid colored backdrop of choice
- Sandbags or weights for weighing down stand
- Step ladder (for adjusting height as needed)
Once you’ve gathered all the necessary gear, clear out a space where you can fully extend the backdrop stand. Make sure you have enough room to walk around it and adjust lights as needed. Having ample space is key for smooth setup.
Assembling the Stand
The first step is assembling the backdrop support stand itself. Here’s how to put it together:
- Lay the legs flat on the ground in an X shape. The pivoting brace should be in the center where the legs intersect.
- With the stand laid out, locate the section connector near the top of each leg. There are holes where you’ll insert horizontal crossbars.
- Take one of the horizontal crossbars and insert one end into the hole at the top of a leg.
- Take the other end of the crossbar and insert it into the facing leg’s connector hole.
- Insert the second crossbar on the other side the same way so the two crossbars create a square/rectangle shape.
- Tighten the knobs on the connectors by hand until snug so the crossbars stay in place. Don’t over tighten.
The main frame of the stand should now be fully assembled and ready for the next steps. Make sure it can fully stand upright before moving on.
Attaching the Backdrop
Now it’s time to attach your backdrop material to the stand.
- Take your backdrop and spread it out on the ground behind the stand. Make sure it’s facing the correct side up and the edges are straightened out.
- Grab the spring clamps that came with the kit. There should be enough to attach one at every point the backdrop will connect to a crossbar.
- Starting at one end, attach a spring clamp to the crossbar, clipping one side to the bar and the other to the backdrop. Repeat this along the entire upper crossbar.
- Once the top edge is attached, lift the backdrop and pull it taut towards the bottom crossbar.
- Attach spring clamps in the same fashion along the bottom crossbar to fully secure the backdrop.
Your backdrop material should now be tightly stretched and ready for use as a background! Make sure there are no wrinkles or warped areas. Gently pull and straighten as needed.
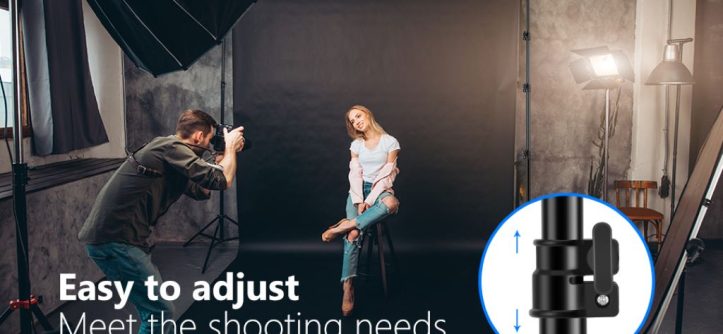
Adjusting the Height
One benefit of the Neewer backdrop stand is fully adjustable height. To adjust the height:
- Loosen the knobs on the section connector halfway up each leg.
- Raise or lower the legs to your desired backdrop height. For full length, extend almost fully.
- When at the right height, tighten the knobs to lock it in place.
- Check that the stand is level at the top by measuring or using a small level tool. Adjust accordingly.
Use a step ladder if you need to reach the upper crossbar and connectors. Safety first when adjusting!
Adding Weights for Stability
The backdrop stand needs to be weighted down for safety and to prevent tipping. Here’s how to add weights:
- Position sandbags, bags of rice, dumbbells, or other heavy objects on the bottom area of each leg.
- You can also hang weights from the lower crossbar using sturdy hooks or rope.
- Distribute enough weight so that the stand feels very stable and anchored to the ground.
- Give the stand a gentle shake to double check. Add more weight if it seems like it could easily tip.
Properly weighting the base is crucial. Don’t skip this important step in the setup process!
Positioning Lights
With the backdrop fully set up, the last step is positioning lighting to illuminate it evenly. Here are some tips:
- Place large, diffused lights close to the background pointed towards it. Soft boxes work great.
- Arrange lights on both sides to light the backdrop evenly and prevent shadows.
- For headshots, position a key light in front aimed towards the subject.
- Use reflectors and extra lights as needed until the backdrop is brightly and evenly lit.
Take test shots and tweak the lighting as needed. The key is making sure the backdrop is lit well enough without overexposing.

Teardown and Storage
Once you’re finished with your shoot, follow these tips for proper teardown and storage:
- Remove any weights or sandbags. Undo any hooks or ties.
- Detach the spring clamps starting from one side until backdrop is detached.
- Gently roll or fold up the backdrop and return it to its case.
- Loosen connectors and slide out crossbars. Break down stand legs.
- Store stand and crossbars in their carrying case to prevent dust buildup.
- Avoid leaning components against a wall. Only lay flat or store vertically.
Proper storage will keep your backdrop stand looking like new and prevent any damage. It’s now ready for the next use!
FAQs
What size backdrop should I get?
For the Neewer stand, 9 x 6 ft and 10 x 8 ft backdrops are recommended. Make sure it’s big enough for your intended use.
How do I prevent wrinkles in the backdrop?
Pull the backdrop very taut when clamping to the crossbars to minimize wrinkles. You can also gently steam the material before shoots.
Why does my backdrop look warped or uneven?
Make sure to set up on a flat, even surface. Weighting the stand can also help keep the bottom straight and smooth.
What height should I set the stand at?
Adjust the height based on your needs. For portraits, around 6.5-7 ft is ideal. For full body, go nearly max height.
How heavy should the weights be?
Aim for around 10-25 lbs on each stand leg. Enough so that shaking the stand does not tip it over at all.
Conclusion
And there you have it—a complete, step-by-step guide to setting up your Neewer backdrop stand for awesome results every time. Delving into the captivating world of wedding photography, the article is wedding photography difficult? Exploring the art and challenges highlights the intricacies of capturing love and emotion, paralleling the meticulous attention required in assembling the frame securely, attaching the backdrop tightly and smoothly, weighting the base for safety, adjusting the height as needed, and lighting everything evenly—a delicate dance between artistry and technical precision. Follow the tips above and you’ll have professional-looking shots in no time. Whether you’re shooting models, portraits, YouTube videos, or more, a properly set up Neewer stand is up to the task. Get out there and start creating!
Tags: diy backdrops, home studio essentials, neewer stand tutorial, photo studio, photography setup, photography tips, PROFESSIONAL PHOTOGRAPHY, set up guide, studio equipment


Leave a Reply